This lesson explains how to turn images of text into editable files. We will use “optical character recognition” (OCR) to work with free text wherever we encounter it in the Egyptian Gazette. Once we’ve transformed OCRed text and performed basic corrections, it will be ready for TEI-XML markup.
You will not need to use OCR on text that has been templated.
There are many OCR options. Each has strengths and weaknesses. I’ll outline a few choices below. I encourage you to experiment with a combination of approaches to see what works best with your particular week. Some issues are clearer than others, both in terms of the printing of the original newspaper itself and its transfer to microfilm. The quality of type varies, as does the white balance and background noise in the microfilm images. Always start with the clearest, straightest images you can produce.
Option A: Google Drive
Strengths:
free program that can be used without limit
multi-language support
continually updated and well-supported
good OCR results
handles line breaks and paragraph breaks well
Weaknesses:
requires images to be cropped into single columns
cumbersome upload process
output can be over-formatted when pasted into author mode
no configuration options
Screen capture walk-through
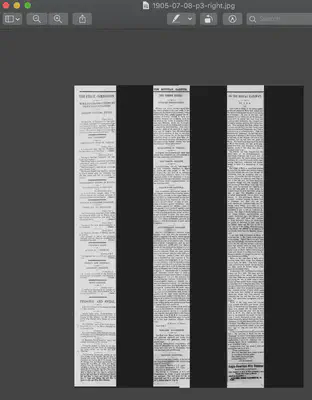
1. Crop your page images into single columns
It can be helpful to embed the column number into the image name. For example, you could call the image of column 1 of page 5 of the July 8, 1905 issue 1905-07-08-p5-c1.jpg.
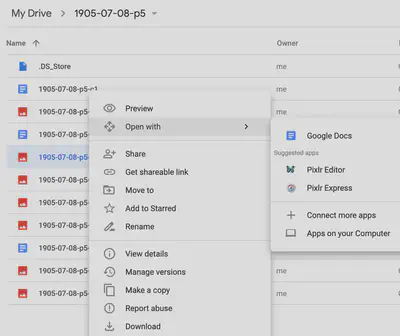
2. Upload the images to Google Drive
3. Convert the image file to Google Docs
Right click on the image file within Google Drive, and open it with Google Docs.
Wait a moment, and a new file will appear containing your image and its text. You may want to correct any spelling mistakes that Google Docs identifies at this stage.
4. Paste results into Oxygen’s author mode
Whenever OCR produces formatted text (rather than plain text such as tesseract gives us), it is best to paste it using Oxygen XML Editor’s author mode (choose it from the text-grid-author buttons near the bottom of your screen). This means that paragraphs and other formatting will carry over into XML. When you switch back to text mode you will see them already marked up.
Pasting into author mode can create some odd div issues. Sometimes it is easiest to create an empty div in text mode, put your cursor inside it, then switch to author mode and paste the OCRed material. Normally it will appear in the right spot. Don’t neglect to go back to text mode and make sure everything looks okay.
When you are pasting column by column from Google Drive conversion, it can be useful to use the <cb n="?"/> tags to keep track of your place in the page.
Option B: Tesseract
Strengths:
lots of configuration options
free, open-source program that can be used without limit
multi-language support
continually updated and well-supported
allows scanning of full page in one go
plain text output can be cleaned easily
Weaknesses:
no graphic user interface (GUI)
plain text output must be converted to XML
can struggle with columns
uneven quality
no in-program correction interface
1. Set up Tesseract
Tesseract is an open-source OCR program supported by Google. It is the engine behind text recognition in Google docs, Google image search, and many other Orwellian applications.
We will be running it on the hard drives of our own laptops. Unlike most programs you will have used, tesseract does not have a graphical user interface (GUI). Instead, you run it from the command line. The command line interface can take a bit of getting used to, but it is relatively straightforward. Also, once you know how to use the command line it’s easier to look under the hood of your computer when you need to.
1a. Access the command line
You need to open a program in order to access the command line.
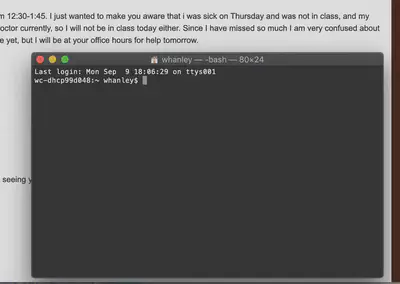
OSX: The command line program is Terminal. You can find it in Applications > Utilities.
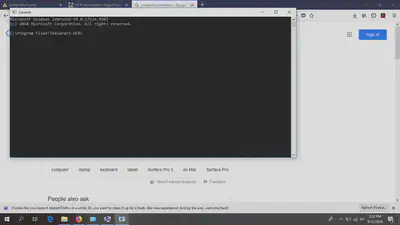
Windows: If you’re using Windows, click Start, then in the Search or Run line, type cmd (short for command), and press enter.
The program you open will look something like this:
When you open this program, you will face a plain black box which offers you no hints or help. But don’t worry! These instructions will walk you through the steps you need for this task, and any search engine will quickly tell you how to do anything else you need.
1b. Install Tesseract
Installation for OSX
Install Homebrew (a “package manager”) by pasting /usr/bin/ruby -e "$(curl -fsSL https://raw.githubusercontent.com/Homebrew/install/master/install)" in the command line, pressing enter, and following the prompts. Then, install tesseract by running brew install tesseract in the terminal. You’ll also want to add French language support: run brew install tesseract-lang.
Installation for Windows
Download this program (compiled by generous folks at the University of Mannheim). Run it, which will install Tesseract-OCR, which will be listed under the start menu. Click on it, then click on Console, and a command line terminal will open.
Copy the whole bottom line except the final >.
In order to use the program easily, you also need to set an environment variable, which requires the following two steps.
In File Explorer, right click on “This PC.” Then, click on Properties > Advanced system settings > Environment Variables. Under System Variables, double click the Path variable. Then click New, and then paste the code you just copied from the console (something like C:\Program Files\Tesseract-OCR). Click OK.
Now under System Variables, click New. Under Variable name, enter TESSDATA_PREFIX, and under Variable value, enter the code you copied from the console, plus \tessdata. Together, the variable should be something like C:\Program Files\Tesseract-OCR\tessdata. Click OK.
Close any terminals that are open.
Test your installation
Open a command line terminal and type tesseract --version. If it says tesseract 4.0.0 or tesseract v5.0.0 or something like that, you have successfully installed tesseract.
If you have some problem in installation, more detailed instructions to install Tesseract can be found here.
2. Transform image into Text
Now that the program is installed, you will be running tesseract from the command line.
2a. Navigate to image directory
First, you must make sure that you are working in the “directory” (location) on your computer that contains the image file that you want to process. Enter the command ls (OSX) or dir (Windows) to see a list of the files in the directory you’re currently in. It’s probably not the right directory. You can learn how to navigate using the command line, but it may be easiest at first to use shortcuts:
OSX: Type cd (“change directory”) at the prompt, then drag the folder containing the text file from Finder into the Terminal, then press enter. The terminal will switch to that location.
Windows: From the File Explorer window that contains the image file, click on the “File” menu, then “Open Windows PowerShell”. Or, if you are more comfortable with command line, you can use cd in console to navigate to your images’ directory.
Once you’ve done this, type ls (in OSX) or dir (in Windows) at the prompt in the Terminal. This will list the files in the current directory. If your image file (which should be in YYYY-MM-DD.jpg format) is listed, you’re ready for the next step.
2b. Run OCR
You can perform a basic read by running the command tesseract <input_file> <output_file>, where <input_file> is the exact name of your image file, including the .jpg extension, and <output_file> is whatever name you want to give the results file. For example, you might say tesseract 1905-07-18-p3.jpg monday-page-three-text.
Open the output file (which will be in plain text) and take a gander at the results. They will be okay, but not as good as we’d like. Probably you will find that the program is reading text lines across more than one column, and it may also be having trouble with French words.
Things should work a bit better using this command:
If everything looks good, proceed to step 2d. If not, follow step 2c.
2c. Help tesseract see the columns
There are various reasons why your OCR results might be poor.
the microfilm itself might be dirty
the image you took might be blurred
the image might be too small or too compressed
the image might not be straight.
Do everything you can when digitizing from microfilm to use the cleanest, straightest images possible.
If tesseract still struggles with your columns, you can trick it by drawing a lines in between the column. Make a copy of your page image (giving it a different name from the original), then use image software (such as Preview on OSX or Paint on Windows) to draw five thin black lines overtop the lines separating columns on the images. Run OCR on this image. The text file that results will contain some reading errors, but it shouldn’t confuse the columns.
If it still garbles the columns, you can try drawing rectangles instead of lines. For example, you can block out the second, fourth and sixth columns. You can also block out ads, templated features, and anything else you don’t need tesseract to read.
Then make another copy, blocking out the first, third, and fifth columns.
When you run OCR on these image, the two text files that result will certainly divide up the contents correctly (though you’ll have to combine them piece by piece).
3. Make basic edits to the raw text
Before moving this raw text into our XML file, we need to prepare it for XML. To do this, use a full plain text editor such as Sublime Text or Atom. (We’ll learn more about plain text editing in another tutorial). Do not use the text editor that your operating system provides, because it does not support regular expressions.
Using Find and Replace in your plain text editor, follow these steps:
Find every < and >, which will almost certainly be OCR errors, and delete or replace them.
XML freaks out if it sees an “and” symbol, and there are lots of them in the Egyptian Gazette. Replace & with &.
Tesseract puts an empty line between most paragraphs that it recognizes. We can use regular expressions to mark these paragraph breaks in XML code. In your text editor, enable regular expressions. Then, find \n\n (the regular expression for double paragraph breaks) and replace with </p><p> (the XML code for paragraph breaks).
In order to complete this file, add a <p> at the very start, and a </p> at the very end. These are necessary to open and close the first and last paragraph.
You should now be able to paste this text into XML without errors.
4. Move the text into your XML file
Copy the contents of the first column in the text file you’ve prepared. Open Oxygen. In the xml file that you’re preparing, put a <div type="item"> <cb n="1"/> </div> pair of tags after the tag corresponding to the page you’ve OCRed. Paste the text in between these tags.
Proceed to copy the second column in your text file. In Oxygen, add an <cb n="2"/> tag, then paste the contents of the second column. Proceed in the same way for the next four columns of the page.
You should have a green box, indicating a well-formed document. If not, correct any errors you find.
Option C: ABBY Finereader
If you prefer to try a GUI OCR program, follow the instructions below. Note, however, that AABBY Finereader is not free, open-source software. It only offers a 30 day trial, after which time you will have to purchase a copy.
requires correcting text boxes to recognize columns correctly
free trial is limited, and program is expensive
OSX version is inferior to Windows version
If you are using Windows:
Download AABBY Finereader. The 30-day, 100-page free trial that they offer should be enough time to complete your OCR work for this class. If you don’t complete it on time, you have the option to buy the software for about $100.
Open the program, then open the image file of the page you wish to read. When you open the document, Finereader will automatically read it. Let it do its work.
Once the initial read is complete, you’ll need to make sure that it’s defined the areas correctly. The areas are the green-bordered boxes of text. Often the machine will skip a word, or draw an extra few words in from a different column. You need to have the whole text read in the proper order, so you’ll want to reshape these boxes so that they cover the text correctly. I’ve sometimes found that it’s best just to drag one box so that it covers a whole column. You can delete the boxes covering any advertisements or other templated material–you’ll copy and paste templates rather than OCR those items.
Once the boxes cover all of the text, you need to make sure that they’re in the right sequence. Click the tool on the left hand menu with a blue down arrow and a red up arrow. This is the tool to reorder the areas of text.
It is possible that your page contains text in French. If this is the case, enclose that text in its own area and set the language (in the “Area Properties” tab at the bottom of the screen) to French.
Once the sequence of areas is correct, click the “read” icon again. The program will reread the text in the order you’ve indicated.
Click on the “verification” icon, and proceed to correct the text. When verifying the text, remember that you are only correcting the automatic reading. Do not correct any errors you might find in the newspaper itself–not even minor spelling errors. We want to preserve the newspaper in its original text, warts and all.
Once you’ve verified some or all of the text, save your verification work. (If you close Finereader without saving the verification separately, you will lose your work). To do this, use the “Save” icon in the middle top of the page. Choose “Plain text” or “Word Document” as the document layout (as you like), and click “Save.” Name the document following the standard format of YYYY-MM-DD-p#. If you click “Format options,” and check “Use blank line as paragraph separator,” it will make your work easier later on. You can now close Finereader without losing your verification work.
Once you’ve finished work on the page, upload it to your personal GitHub repository.
If you are using Mac:
This is one of the rare instances when you may be better off using Windows. If you can get ahold of a Windows machine and use Finereader following the instructions above, that may be easier. If not, you can use the Mac version of Finereader, which you can download here. The Mac version lacks a verification tool, but it works okay. When you open the .dmg file you’ve downloaded, don’t install the program by dragging it into your applications folder. Instead, doubleclick the Finereader icon and run the program directly. That way you may face fewer problems if your trial period runs out.
To use Finereader on a mac, follow steps 2 to 5 of the instructions above. Then, click “Export.” Choose a format (I recommend plain text, but .doc is also useful) and save the file. Then open that file for text correction and to transfer the text into the Oxygen XML editor.
If your trial license runs out:
The free version of Finereader Online allows you to OCR 10 pages per month. This should help if you don’t manage to finish all of your OCR in time. Note that there is no verification tool in the online version.
Option D: Cisdem (OSX only)
I’ve also had good results with Cisdem OCR Wizard. I’m not sure how long their free trial lasts, but it’s worth a try, and can also be purchased for $60. Follow the directions below.
Strengths:
multi-language support
allows scanning of full page in one go
Weaknesses:
requires correcting text boxes to recognize columns correctly
free trial is limited, and program is expensive
OSX only
Using Cisdem
Open the program, then open the image file of the page you scanned (likely page 2 or 3). When you open the document, Cisdem might automatically analyze it, or it might require you to press “recognize”. Let it do its work.
Cisdem seems to recognize newspaper columns quite well, and you can probably simply proceed to OCR once the recognition is finished and correct by hand later. But if you notice egregious errors, reshape the green boxes.
Select .text or .docx as the output format, and click export. Wait. When you are offered the option to save the document, name it following the standard format of YYYY-MM-DD-p#.
Once you have saved the text file, open it and proceed to correct the text. It may be most convenient to have the image file on one half of the screen and your text editor on the other. When verifying the text, remember that you are only correcting the automatic reading. Do not correct any errors you might find in the newspaper itself–not even minor spelling errors. We want to preserve the newspaper in its original text, warts and all.
Once you’ve finished work on the page, save it–soon we’ll upload it to your xml issue file.
(There are other options, too, but none seems to work as well as Cisdem: you could try the 10-day, 100-page trial of Readiris Pro. PDF OCR X Community Edition also didn’t do a great job, but it’s free).
FAQs
How many errors should I expect to find?
If you find a very large number of misread words, you might consider re-scanning the page at a higher resolution or a better focus.
How do I deal with accented letters?
Preserve all accents (e.g. in words like début). You will need to enter accents as single characters. To do so, use the extended keyboard. Here are some pointers for Windows and Mac.
What if I can’t read the text?
Wrap it in an <unclear> tag, and maybe add a <!-- comment --> explaining what’s going on.